A Ninjago Party for Casper's 6th birthday. Such a fun day!

It's all 'Ninjago' in Casper's world at the moment. So when I asked him what sort of birthday party he was thinking of, I shouldn't have been surprised when he said a 'Ninjago Party' (with no option for an alternative!).
It was a bit of a challenge to figure out what to do without reverting to commercial and disposable Ninjago partyware. But once I discovered that Ninjago is all about the yellow face and the angry eyes (and I mastered drawing those!) I was all set and on a roll!


First -- the Ninjago Party invites. We cut the Ninjago eyes out of an envelope and inserted a yellow card on which we drew the eyes (and wrote text on the back). Presto!

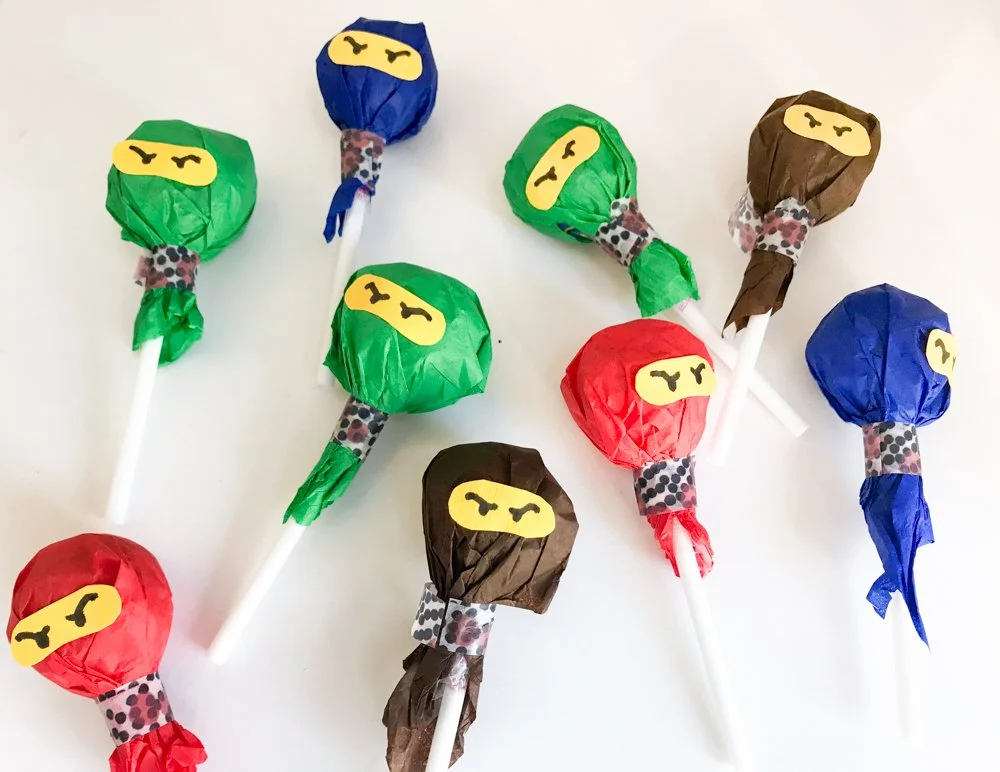
Then we prepared Ninjago lollipops: wrapped them in coloured tissue or kite paper, secured with masking tape cut in half lengthwise, and with yellow Ninjago eyes glued on it.


Pim made the table decor -- Casper's name in Lego blocks and decorated with Ninjago guys. And Sara decorated our yoghurt pots with Ninjago eyes and a little felt headband. To be filled with yellow lemonade later :).
Instead of cake, I made cupcakes and used yellow fondant and a chocolate icing pen to make the yellow Ninjago eyes.
I downloaded a free Ninjago font and printed the children's (and our) names on iron-on paper, to make Ninjago headbands. Here's my team of helpers!

On the day of the party, we gave all the children a Ninjago headband (and wore ours too, of course).
The party decor was simple -- Ninjago balloons, the cupcakes, and the cute Ninjago yoghurt-pot glasses, with Pim's beautiful centrepiece on the table.


We gave everyone an activity card for around their neck, with a Ninjago guy drawn in the middle and numbers around it for all the activities. Children always love these kind of cards where they can collect stamps or stickers for each completed activity.


The first activity was calm. We put crayons and felt tips on the table and let the children create a Ninjago artwork. We had cut white drawing paper to size beforehand to fit in simple frames (which we bought). I had drawn simple Ninjago shapes on the paper (I had become quite an expert by this time!). They loved this activity!


As a next activity, Sara gave a quick Yoga workshop (warrior pose etc) on the terrace.


The third activity was an obstacle course in the garden. Throwing, crawling, jumping -- this is always a hit!! (We were lucky with the weather, but we've also done an obstacle course in one of the bedrooms before.)


Using thick yarn, we had created a lazer room of Sara's bedroom. In the room, we hung keys with the names of the children. As a fourth activity, they had to find the key with their name on it — avoiding the 'lasers', of course! With their keys, they could open the locks of Pim's treasure chest (in which we hid the lollies). This was a bit of a puzzle, because we used all sorts of different locks.


Now that all the activities were completed, it was time for the Ninjago ceremony. The children were all knighted Ninjago by our in-house Ninjago Master. And they each got their own Ninjago Diploma to take home (together with their selfmade Ninjago artwork, another Ninjago lollipop, their headband and a little Lego Ninjago surprise bag).
Waiting to be picked up, we let them watch a little Ninjago film. They were pretty worn out, haha! I think they had the best party. (I love how they are still wearing their headbands!).
xxx Esther
PS Do you remember Pim's Lego party? I used some of those ideas for this Ninjago Party for Casper.